
I was browsing Pinterest for outfit ideas when I noticed that most of the girls in the high-waisted shorts, dresses, and pats all had crop tops. As you know from past posts, I am pretty budget conscious and had already met my budget in new cloths for the quarter, so my choices were either not wear the cloths outside the house or make one. So me being me decided that I could make my own crop top.
For those of you who follow me on Instagram may have seen some of the steps already a couple moths ago but below is the whole project!!
What you will need for this project:

Fabric- about a yard (I did an eyelet lace and did a pink cotton fabric for a liner)
Drafting paper - I used news paper because we had it on hand :)
Marker/pen for drafting
Zipper
Thread
Flexible measuring tape (to measure bust and circumference etc
Small ruler/strait edge
Strait pins
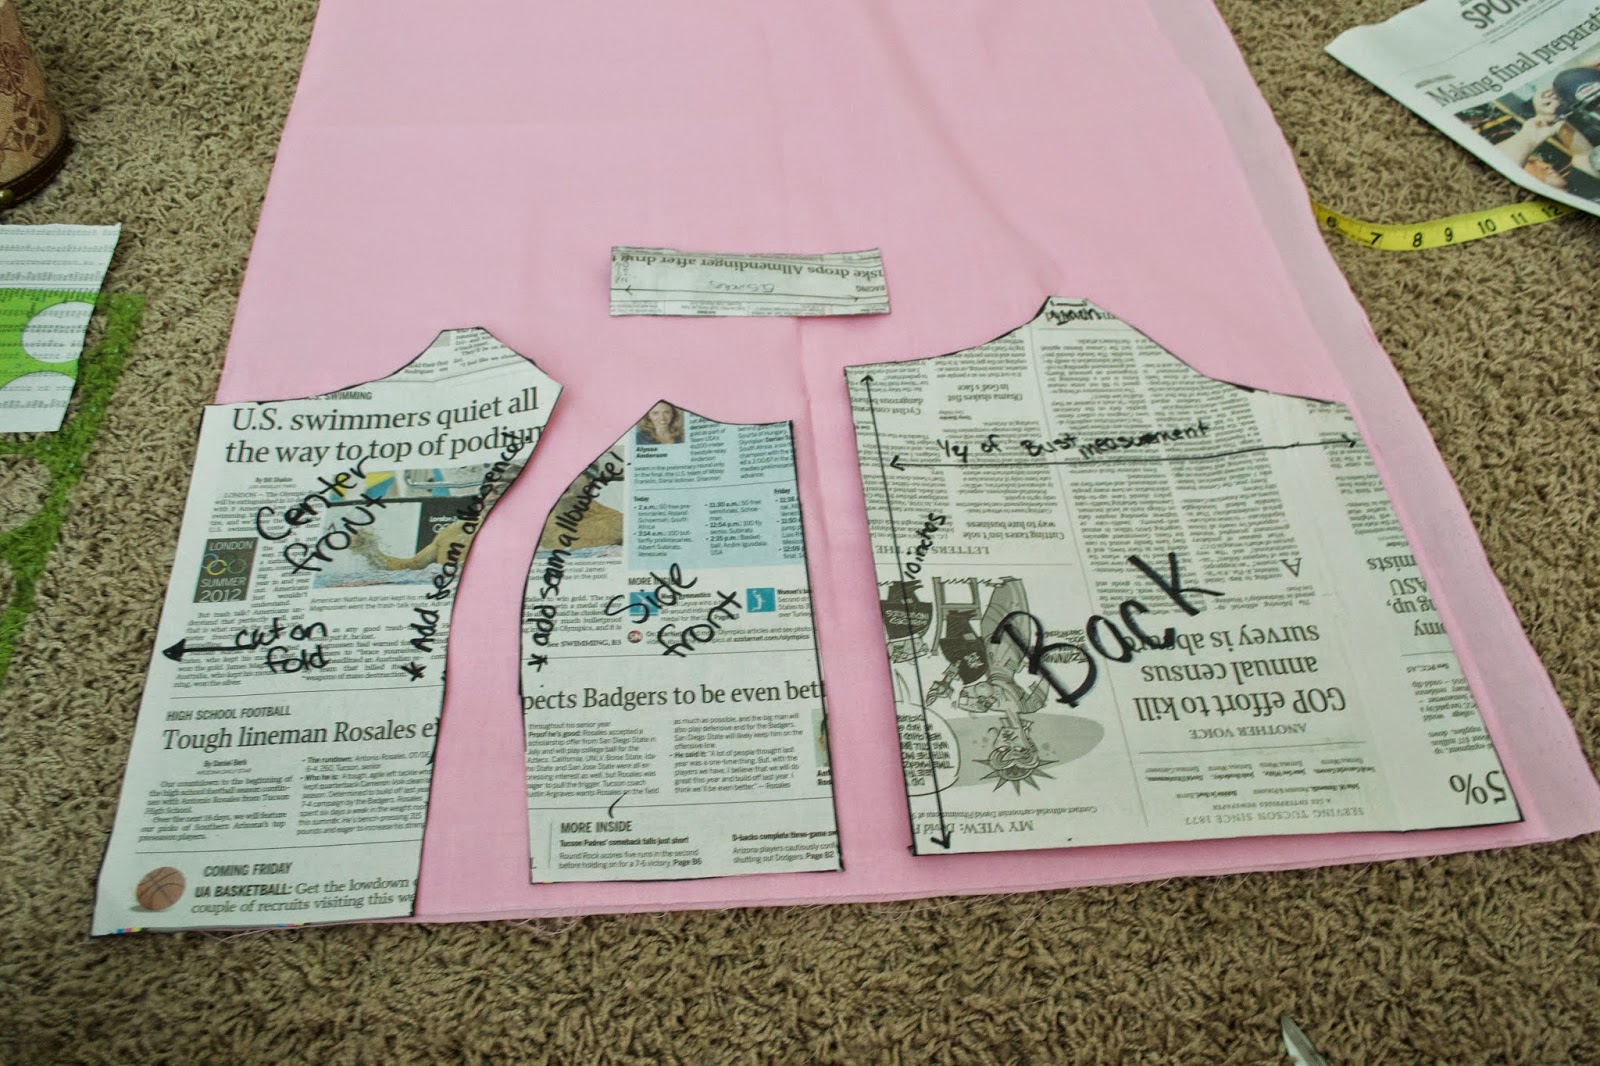
The first thing I did was take one of my existing tank tops and folded it under to the hight I was comfortable with and pinned it to save the hight.


Then I folded it in half and laid it on the newspaper and traced the outline. This will make one quarter of the shirt


After doing this I realized that my shirt fabric stretches and the fabric I was going to cut was not so I took the flexible tape measure and measured the circumference around my chest and divided that by 4 and adjusted my shirt width accordingly.
Make sure to label this one as the "BACK" part of the shirt and make a seam allowance around the edge.

I then traced the "back part" onto a new piece of paper and cut it out. (wow Olympics...see how old this paper is!?)


I then cut these pieces out and labeled the bigger piece "center front) with the left side saying "cut on fold" (even though I didn't follow my own directions later... sigh) and a reminder to make a seam allowance. The right side I labeled "side front" and a reminder to add a seam allowance.

Next I made my strap pattern. I did this by measuring the length of how I wanted my strap and dividing it by two, I did the same with the width and kept in mind that I would want my cloth to be folded in thirds. **I forgot to make a reminder to myself to cut on the fold and ended up having to to this part twice. :(***

Next I cut out my Pieces
 |
| This is the correct layout for cutting out the big pieces on the folded fabric |
 |
| THIS I cut out in the wrong order :( So I ended up wish weird from pieces |

Next I sewed all the pink fabric to my white fabric. Then sewed the pieces together in the order below. **Keep in mind you want the bottoms to line up so I sewed from the bottom lace part to the top.***

The hardest part was the zipper, I have no tips or tricks for this yet except YOUTUBE... I had to watch like 6 zipper videos and I got it to work

Finally I joined the front to the back and attached the straps!


Ok so things I would change now that its finished, I think I made the shirt too long for the outfit, or the shorts just aren't right because they are a loose fabric they make me look bigger then I am. I'm half temped to see if I can make the shorts into a cute skirt... What do you think? would that be a better option?